In this topic: Allocating from an account to a class, by drag-and-drop |
This lesson shows how to allocate income or expense from an account (electricity expense in this case) to cost center and profit center classes. Most people are surprised at how useful this feature can be, because it lets you assign expenses to classes outside of QuickBooks without requiring you to enter even one class-specific transaction in QuickBooks. allocation of once they see how it reduces the number of class-specific transaction entries required in QuickBooks.
| In these lessons, "allocated out" and "allocated to others" means allocating income or expense from the current account or class to other items (cost centers and/or profit centers). |
Allocating from an account to a class, by drag-and-drop
| 1. | Select or open the Chart of Accounts window in ManagePLUS Gold. |
(If you don't remember how, see lesson 3.)
| 2. | Scroll down to the Utilities:Electricity account, right-click in the OUT (allocated to others) column, then select Edit / View cell details from the popup menu. |
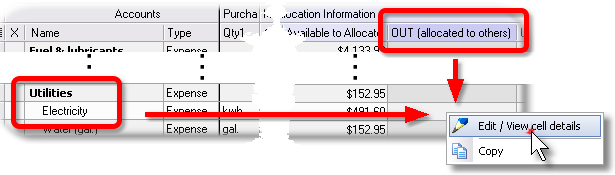
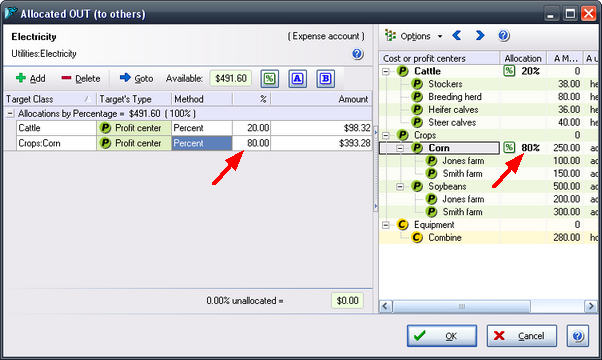
The Allocated OUT (to others) dialog will open. (There's a full screen shot of it at the end of this lesson.)
| "Allocated out" means amounts allocated from this item (account or class), and "to others" means the cost centers and/or profit centers that will be the targets of this item's allocated amounts. |
| 3. | Drag the [%] token into the right pane and drop it on the Cattle profit center. |
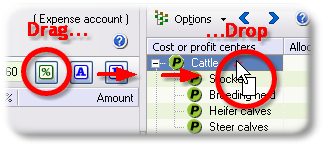
When you do, ManagePLUS adds a new allocation line in the left pane.
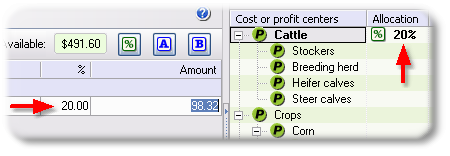
| 4. | Type 20 in the % column of the new allocation line, then press the Enter key. |
The dialog should now have an allocation line in the left pane for allocating 20% of Utilites:Electricity to the Cattle profit center, and the right pane should display the same information in its class tree.
|
Allocations don't happen immediately...
All that's happened so far, is that you have established a formula for how to allocate Electricity expense. The Amount shown above, $98.32, will be allocated to the Cattle profit center only if nothing else changes—i.e., if you don't change or add any transactions in QuickBooks. The actual dollar amount to be allocated won't be calculated until you prepare a Profit Analysis Report. |

Next, lets see how to accomplish the same thing a different way.
Allocating from an account to a class manually
Continuing in the same Allocated OUT (to others) dialog...
| 1. | Click on the Add button in the left pane. |
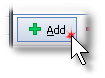
This adds a new, blank allocation line to the list of formulas.
| 2. | Click in the Target Class column of the new row, then click the down arrow, and select Crops:Corn from the list of classes. |
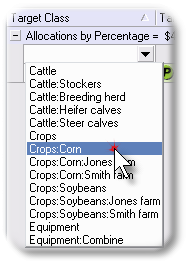
| 3. | Press Enter to accept Crops:Corn as the target class. |
The dialog should then look something like the following. The red arrows indicate that 80% of Utilities:Electricity will be allocated to the Crops:Corn profit center.
| Why 80%? When you add a new allocation line ManagePLUS Gold automatically assigns the remaining available percentage. You can change it at any time, of course. |
| If allocating electricity expense to these two profit centers seems odd to you, don't worry...it is! You're only making this allocation "for educational purposes", so that a later lesson can illustrate a particular feature. |
| 4. | Don't close this dialog just yet! ...you'll need it for the steps below. |
Seeing where your allocations went
Continuing in the same Allocated OUT (to others) dialog as shown above...
In these steps you'll see how to jump to the target of an allocation (the Crops:Corn class in this case) and view the amounts allocated to it.
| 1. | Click in any cell on the Crops:Corn row so that it is selected (highlighted), as shown above. |
| 2. | Click the Goto button on the dialog's toolbar to jump to the selected class. |

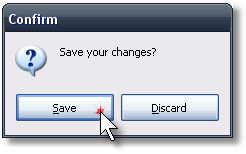
ManagePLUS Gold will need to close the Allocated OUT (to others) dialog before jumping to the Crops:Corn class. If you've made any changes you'll be asked whether or not to save them. If this dialog is displayed, click on the Save button:
ManagePLUS Gold will jump to the Crops:Corn row of the Classes window and will select the IN (allocations from others) cell.
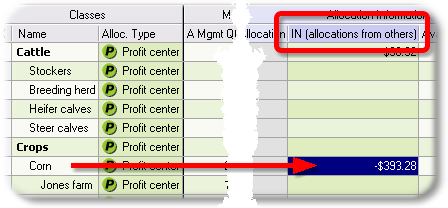
| 2. | Open the detail dialog for the IN (allocations from others) cell by pressing the F2 key or using any of the other means described in a prior lesson. |
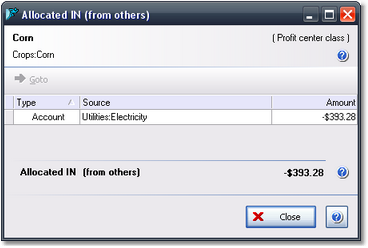
As you can see, it shows the amount allocated to Crops:Corn from the Utilities:Electricity account.
| Seeing where allocations "went" is not something you necessarily must do; it's just available if you should want to. |
See also:
Working with Cost Centers, Profit Centers, and Allocation in How-To Procedures