In this topic: Sending allocation transactions to QuickBooks |
When you create or change allocation formulas ManagePLUS Gold automatically creates transactions to distribute the allocated amounts to cost centers and profit centers. But besides using those allocation transactions for getting reports in ManagePLUS Gold, you may also send them to QuickBooks and use them there for any purpose you wish. This lesson shows how to send allocation transactions to QuickBooks, see their effect on a QuickBooks Profit and Loss by Class report, and delete them from QuickBooks.
Sending allocation transactions to QuickBooks
To send allocation transactions to QuickBooks:
| 1. | Click on the Send button in the main toolbar, or select Lists > Send transactions to QuickBooks from the main menu. |
![]()
A pop-up dialog will explain what's about to happen and ask if you want to continue:
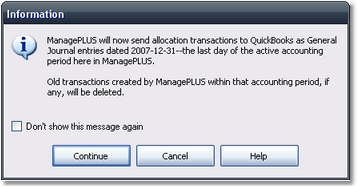
| 2. | Click Continue to let ManagePLUS Gold send the transactions. |
| Sending will be quicker if QuickBooks is already running. |
When finished, ManagePLUS Gold will display a message telling whether sending was successful.
| 3. | Click OK to close the message window. |
That's all there is to it!
| ...Or at least that's all there is to it for you: ManagePLUS Gold had to do a lot of work behind the scenes. For details on everything that happens when transactions are sent to QuickBooks, see the topic Sending/deleting allocation transactions to/from QuickBooks, in How-To Procedures. |
Seeing the effect of allocation transactions in QuickBooks
ManagePLUS Gold creates allocation transactions as General Journal entries, dated the last day of the active accounting period. So you may find them in any QuickBooks report which includes Journal entries for that date. But it's probably more useful to see their effect on the Profit and Loss by Class report.
The steps for creating a Profit and Loss by Class report in QuickBooks may vary from the following, depending on which version of QuickBooks you use.
| 1. | In QuickBooks, choose Reports > Company and Financial > Profit and Loss by Class from the main menu, to open the Profit and Loss by Class report. |
| 2. | In the report window, click on the Modify Report button to open the Modify Report dialog. |
| 3. | On the Display tab of the Modify Report dialog, enter a date range that matches the date range of the active accounting period open in ManagePLUS Gold. |
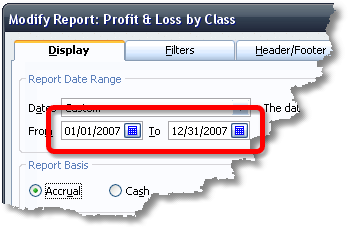
| 4. | On the Filters tab, filter the report to include just the Crops:Corn class (to limit the number of columns in the report). |
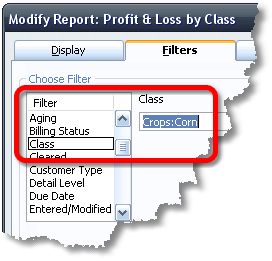
| 5. | Click OK to close the Modify Report dialog. |
The report will be displayed with the modified settings.
| 6. | Scroll down if necessary, to the Allocated Expense (MP) section. |
The Equipment_Combine line shows the amount allocated from the Equipment:Combine (cost center) class to the Crops:Corn (profit center) class.
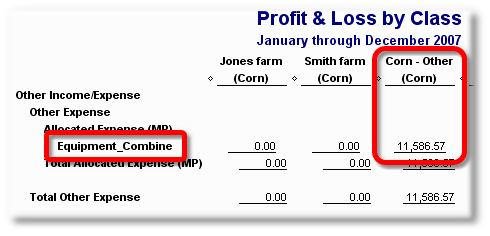
| 7. | Double-click the Equipment_Combine line of the report to "drill down" to the transaction(s) associated with that line. |
QuickBooks will open a second report window showing transaction details. In this case there's one transaction—one of the allocation transactions sent by ManagePLUS Gold:

| 8. | Leave both of these report windows open for a while... |
The steps below refer back to them.
Deleting allocation transactions from QuickBooks
Deleting ManagePLUS Gold's allocation transactions from QuickBooks is not required: leaving them there won't negatively affect any of your financial or tax reports. However, you might want to delete them in some cases; for instance, maybe you are sending the QuickBooks file to your tax preparer and don't want him or her to be concerned with the allocation details.
To delete allocation transactions from QuickBooks:
| 1. | Click on the Delete button in the main toolbar, or select Lists > Delete transactions from QuickBooks from the main menu. |
![]()
A pop-up dialog will ask you to confirm that you want to delete allocation transactions for the active accounting period:
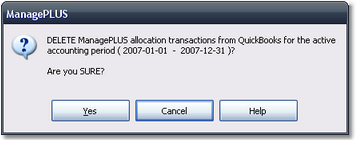
| 2. | Click Yes to let ManagePLUS Gold delete the transactions. |
When finished, ManagePLUS Gold will display a message if any transactions were deleted.
| 3. | Click OK to close the message window. |
![]() Note: ManagePLUS Gold deletes allocation transactions only within the dates of the active accounting period. To delete transactions outside of that date range—for a period covering several years, for instance—you must select an accounting period in ManagePLUS which spans the entire date range, then delete transactions as described above.
Note: ManagePLUS Gold deletes allocation transactions only within the dates of the active accounting period. To delete transactions outside of that date range—for a period covering several years, for instance—you must select an accounting period in ManagePLUS which spans the entire date range, then delete transactions as described above.
| 4. | Return to QuickBooks. |
| 5. | Look at the two QuickBooks report windows you opened earlier (in the previous section of this lesson). |
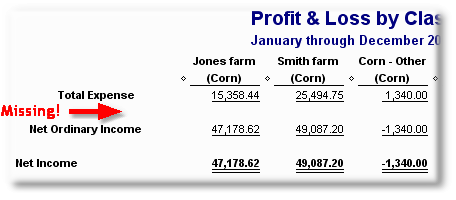
Compare the following report illustrations with the earlier ones:
| • | The Profit and Loss by Class report no longer has an Allocated Expense (MP) section. |
| • | The Transaction Details by Account report now displays "Deleted!" where the allocation transaction was listed before (and if you refresh the report, the line will be removed entirely). |

See also:
Sending/deleting allocation transactions to/from QuickBooks, in How-To Procedures